|
About Watermelon
Watermelons are a summertime treat enjoyed by young and old alike. There is nothing quite as refreshing as a cool slice of watermelon in the hot summer days of July and August. In addition to tasting great, watermelons are a leading source of lycopene (commonly found in tomatoes), in addition to being a very good source of vitamin A and C.
When to Plant
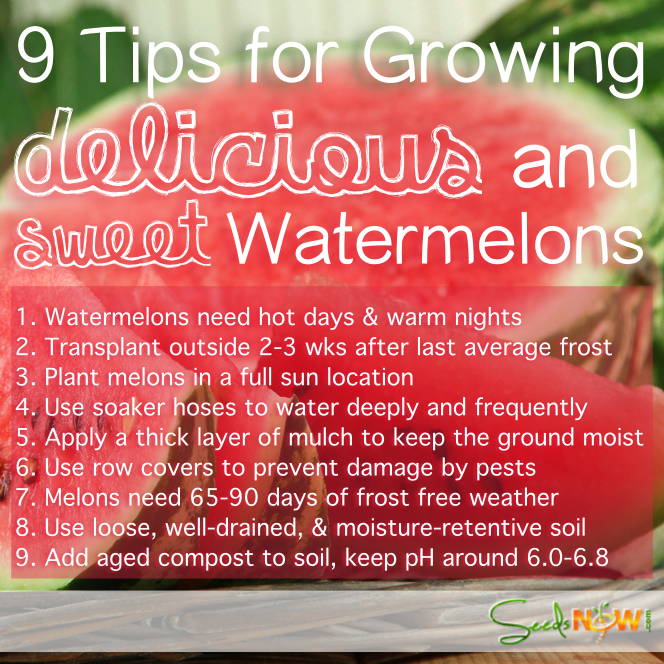
Because watermelons require a long, warm growing season, their best production in the United States occurs in the South and Southwest regions, where there is ample growing time and warm weather. Home gardeners in cooler regions can usually do fairly well with watermelons if they start seed indoors a month or more ahead of planting outdoors, but the vines need consistently warm days and nights to thrive. Watermelons need at least 80-100 consecutive days of very warm summer temperatures, at least 80 degrees Fahrenheit. Watermelons also prefer warm nights, above 70 degrees Fahrenheit is preferred. Watermelons are a warm-season crop, very tender to frost and light freezes. Plan an average of 2-6 plants per person. Watermelons generally take up enormous space, and should not be considered for the small vegetable garden. There are compact varieties that produce tasty and prolific fruits.
To get a head start on the long growing season, start plants indoors 4 to 5 weeks before outdoor planting time. The soil must be warm and the weather settled with warm days and nights, as the plants are sensitive to cooler weather. If nights are cool, use hot caps to protect the plants. Melons can be sown directly outside, but some gardeners report better germination with pre-sprouted seeds.
How to Plant
If you start melons indoors, use individual cells or peat pots, not flats, as the roots are too succulent to divide. When you direct sow, plant 2-3 seeds in a hill and then thin the appropriate spacing, depending on whether you train them on a trellis or let them spread on the ground.
For direct sowing and transplants, cover seedlings with hot caps to protect from frost, speed growth, and keep out pests. The vines do best if planted in hills. Rows and hills should be set 5 to 6 feet apart each way, with 2 or 3 plants per hill. Thin to the 2 strongest plants in a week.
To encourage side shoots, when seedlings have 3 leaves, pinch off the growing end. When new side shoots have 3 leaves, pinch off the central growing area again. When fruits begin to form, pinch back the vine to two leaves beyond the fruit. Make sure fruits on a trellis are supported by netting or pantyhose, and fruits on the ground vines are elevated by empty pots to prevent disease and encourage ripening.
The vines are heavy feeders, and also need adequate moisture as they start to develop. Troughs near the plants can be flooded for effective watering. For fertilizer, give each hill about 1/2 cup of 5-10-5 fertilizer, liquid manure or fish emulsion 3 weeks after planting, and again (if you can find the original hill) after flowers appear. Keep the hills well-watered up to the time fruit starts to fill out. Since weeding and cultivating are such problems with sprawling vine crops, black plastic or thick mulch proves an excellent aid to keeping weeds out, soil moisture in, and melons off the ground as they develop. The plastic mulch should be placed on the ground and anchored before planting, then central holes cut for the hills, with a few extra slits to let rain and hose water filter through. Plain cardboard and newspaper covered appropriately also work well in a smaller garden setting.
How to Harvest
Knowing when to harvest watermelons is the most difficult part of growing them. They should be harvested at the peak of freshness for best results. Waiting too long gives you nothing but a mealy mess. Not waiting long enough means you may have to throw an inedible treasure out to the chickens.
There are several methods to identify a ripe watermelon, most of which are not entirely accurate at best. Some say you should tap them and listen to the sound they make, some say to look at the small tail to determine it's ripeness. The fact is, these are not reliable indicators for all watermelon varieties. The most reliable indicator of ripeness is the color. Ripe watermelons will have darker stripes and the spot the rind rests on will turn from white to golden yellow. Different varieties will darken to different degrees, but this will be your best indicator. If all else fails, plant a variety like Sugar Baby. Its green stripes darken to almost black when it is ripe, which makes the puzzle a little easier.
|


